We at Mosaic HQ, love doing dirty engineering things on our own. And one of such thing is to deploy our backend application (which takes a good amount of preloading time) without any downtime. We’ve got used to most out-of-the-box solutions like Heroku, Fly, or Appliku, but we want to get this straight this time.
Our application running setup
We are running a Python-based application to support one of our services, which is containerized using Docker. I don’t want to dwell too much into what Docker is and how Docker works, but this tweet should help you to get some idea. https://x.com/nav_devl/status/1816182904759935193
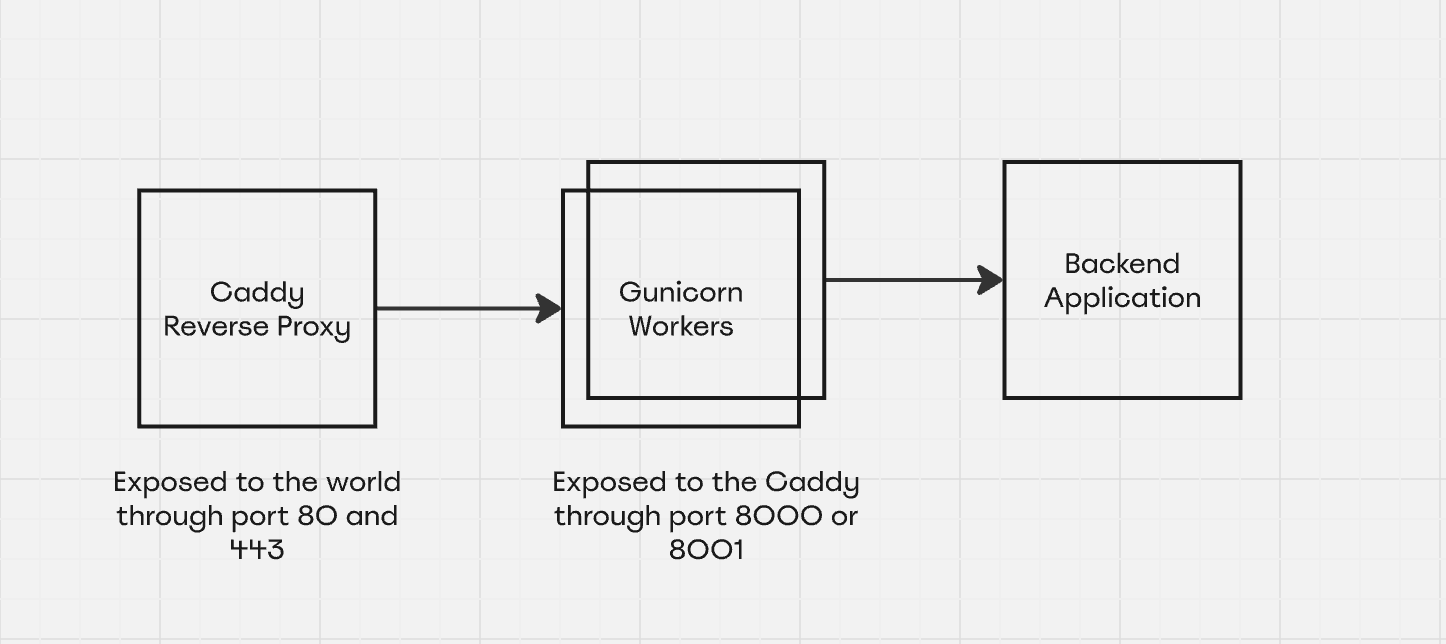
And this docker container is exposing a port which is reverse proxied by Caddy server. Basically this is how our application infra looks in simpler terms. Please note this is highly abstracted visual representation of the system’s state.
The current Dockerfile
If you have read our blog on how to run your own OG image already, you might know that our code needs Playwright, and the Dockerfile also has an instruction to have those installed before starting up our application.
For the sake of simplicity, we have removed some parts of the Dockerfile instructions that we have in running Mosaic, but this is the simplest and most important line that is needed.
# Use an official Python runtime as the base image
FROM python:3.11.2

# Set the working directory
WORKDIR /code/

COPY ./requirements.txt /code/

# Install Python dependencies
RUN pip install --no-cache-dir -r requirements.txt

# Install Playwright
RUN pip install playwright

# Install Playwright system dependencies
RUN playwright install-deps

RUN playwright install

# Copy the rest of the application code
COPY . /code/

# Expose the port your app runs on (adjust if needed)
EXPOSE 8000
EXPOSE 8001
Running the Docker
Now, once the Dockerfile is ready, we have to build our Dockerfile.
docker build . -t app-backendAfter building, you can find the built image by running docker images .
To run our application using the image we built now, we need to run the following
docker run -d -p 8000:8000 app-backend gunicorn app.main:app -c gunicorn.conf.pyAnd now you have your docker instance up and running. Now you changed some code, what is the next step?
You need to build your code again. Same above command to build. But to start the
application again with the updated code, you basically have to stop the docker
container using docker stop and then again run it with the command above. The
time between you have stopped your container and the time it takes to be up and
running would be ultimately the down time.
Even though the founders of Mosaic are usually work at the speed of light, still it leads to few seconds of downtime, which is something we dont want our users to have. And this is where we were aiming to have a very simpler approach to provide nearly zero downtime. A few milliseconds is fine for us. Like 500ms would be okay.
The magic starts here
To achieve a near zero downtime approach, we have decided to do the following.
- Build the image again with the new code. Basically now you have updated your
image with new code. But the container that is still running is holding the
older image. Lets call it as
OldMosaicContainer - Spin up another docker container but instead of exposing in port 8000, I
wanted it to expose in port 8001. Lets call this as
NewMosaicContainer - Now our Caddy Server is still reverse proxying all the requests to port 8000. So basically we need to modify our Caddyfile, so that our server will start proxying to 8001.
- Perfect. Reload the Caddyfile and you have your internet users getting new code features.
- Still we have few caveats that we should be aware of.
Handling the caveats
Even though the above implementation get us our deployment done smoothly, we
should be aware of new code deployment going wrong. So, without ensuring that
the new container is heathy and running, we should never modify and reload our
Caddy server’s logic. Now how do we do that? docker run command also have
flags with which we can add health endpoints or health commands to run, so that
if our new code has any issue, this will stop the new container and exit the
process there by our users wont get affected, but still will be experiencing the
old features.
And next, once we are sure, and updated the Caddyfile, we should stop the old containers. This is to ensure we get our resources back and can be used by the new container fully.
The below gist can help you get started and we can obviously help you with simpler zero downtime scripts that also can support docker-compose as well.
https://gist.github.com/Navdevl/0e34061880b5d91cd38c12364d81770c
